We are known for the quality of the data sensor annotation we provide for machine learning projects. We understand the challenges self-driving car companies face and the intricacies involved in creating high-quality annotations. We will discuss in this article the vital considerations that must be considered when setting up a sensor annotation project.
What is Annotate Thermal Sensor?
It refers to adding additional information or metadata to the readings generated by the thermal sensor. This information can help to interpret the data and provide context, making it easier to analyze and understand. In the case of the MLX90640, annotating the readings from this thermal sensor involves adding information such as the location, time and date, or other relevant details that help make sense of the temperature data.
How Does Annotate Thermal Sensor MLX90640 Work?
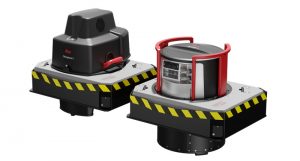
MLX90640 is a sophisticated thermal sensor that leverages infrared technology to determine temperature readings. This innovative device furnishes a non-contact method of measuring temperatures for various uses, such as building automation, HVAC systems, and industrial controls. Its compact size, elevated resolution, and broad temperature measurement range make it an excellent option for various industries.
Software And Tools For Sensor Annotation
Sensor annotation tools and software play a big role in data categorization and labelling. The programs are used for identifying objects, analyzing speech, analyzing sentiment, and tagging images, videos, audio, and text.
You have lots of options when it comes to choosing a sensor annotation tool. Some of the most popular ones are Labelbox, a web-based tool for collaborative labelling, and RectLabel, a Mac-only tool. And CVAT, an open-source annotation platform.
It’s important to consider your specific needs and the data type when choosing a sensor annotation tool. It is possible to improve the accuracy, efficiency, and quality of annotation using the right tool.
Follow these steps to connect the MLX90640 thermal camera to a microcontroller or computer:
- Gather all the components you need: A microcontroller or computer, wires, and a power supply for the MLX90640 camera.
- Connect the camera to the power source: Connect the positive wire to the “Vcc” pin and the negative wire to the “GND” pin. It’ll power the camera.
- Connect the camera to the microcontroller or computer: Connect the SDA and SCL pins of the camera to the appropriate pins on your device. If you’re using a computer, you may need an I2C adapter.
- Install the necessary software: Your platform may require libraries or drivers to work with the camera. Check the documentation for the camera and your device for more information.
- Test the connection: Run a simple test program to make sure you can receive data from the camera.
You may need to set up your microcontroller or computer differently depending on your specific model. You should follow the instructions provided by the manufacturer for the most accurate information.
A Guide To Annotate Thermal Sensor Mlx90640
If you wish to gain a deeper understanding of the temperature distribution of an object or an environment, MLX90640 thermal sensor data can be annotated.
The following steps will help you annotate thermal sensor data comprehensively and precisely:
- Set up the MLX90640 thermal sensor: Use the I2C interface to connect the MLX90640 thermal sensor to a microcontroller or computer. Make sure that the sensor is properly powered and connected.
- Acquire the thermal data: After the MLX90640 has captured thermal data, use a software tool like Matlab, Python, or OpenCV to collect and store it.
- Visualize the thermal data: Create an image representing each temperature measurement using the thermal data. You can display the image in grayscale or color to highlight temperature variations.
- Annotate the thermal image: Using the software’s sensor annotation functions, you can add labels, scales, contour lines, and other markings to the image. You can also add notes, annotations, or callouts to specific regions of the thermal image.
- Validate the sensor annotation: Make sure they are accurate and complete. It is important that the annotations on the thermal image accurately reflect the temperature distribution.
- Save and share the annotated thermal image: Once the sensor annotation has been completed, save or export the image for further analysis.
Follow these steps, it is possible to easily visualize the temperature distribution of MLX90640 device data.
Read Also: Exploring the Possibilities of Precision Laser Processing 2023
How To Improve The Accuracy Of Sensor Annotation
They understand the domain and what they do. To ensure the annotations are accurate, use quality control processes.
It would help if you used the right tools and software for sensor annotation based on your needs, considering user-friendliness, customization options, and performance.
You can consider the context in which the thermal data was collected, including the time, location, and environment, to ensure that the annotations accurately reflect the actual conditions.
Keep an eye on the sensor annotation process and results and improve to maintain high accuracy.
Conclusion of Thermal Sensor Annotation
In conclusion, thermal sensors are a valuable tool for annotation as they provide an accurate, real-time measure of temperature. Not only do they reduce the margin of error in the sensor annotation process, but they also provide a more precise approach to measuring the temperature of objects and environments. Thermal sensors offer a reliable and efficient way to annotate data that can be used to analyze object temperatures over time and even predict future behaviour.